Boost Your Website Speed with Free Image Compressor Tools
Master image optimization with our complete guide. Learn compression techniques, best formats, and use free image compressor tools to boost website speed and SEO performance.
This comprehensive guide covers everything you need to know about image optimization for web performance. Learn how to compress images effectively, choose the right formats, implement responsive images, and use free image compressor tools to reduce file sizes without losing quality. Perfect for beginners and professionals looking to improve website speed, user experience, and search engine rankings through proven image optimization strategies.
What is Image Optimization and Why Does It Matter?
Image optimization is the process of reducing image file sizes without significantly compromising visual quality. In today's digital world, where visual content dominates websites and applications, mastering image optimization has become crucial for success.
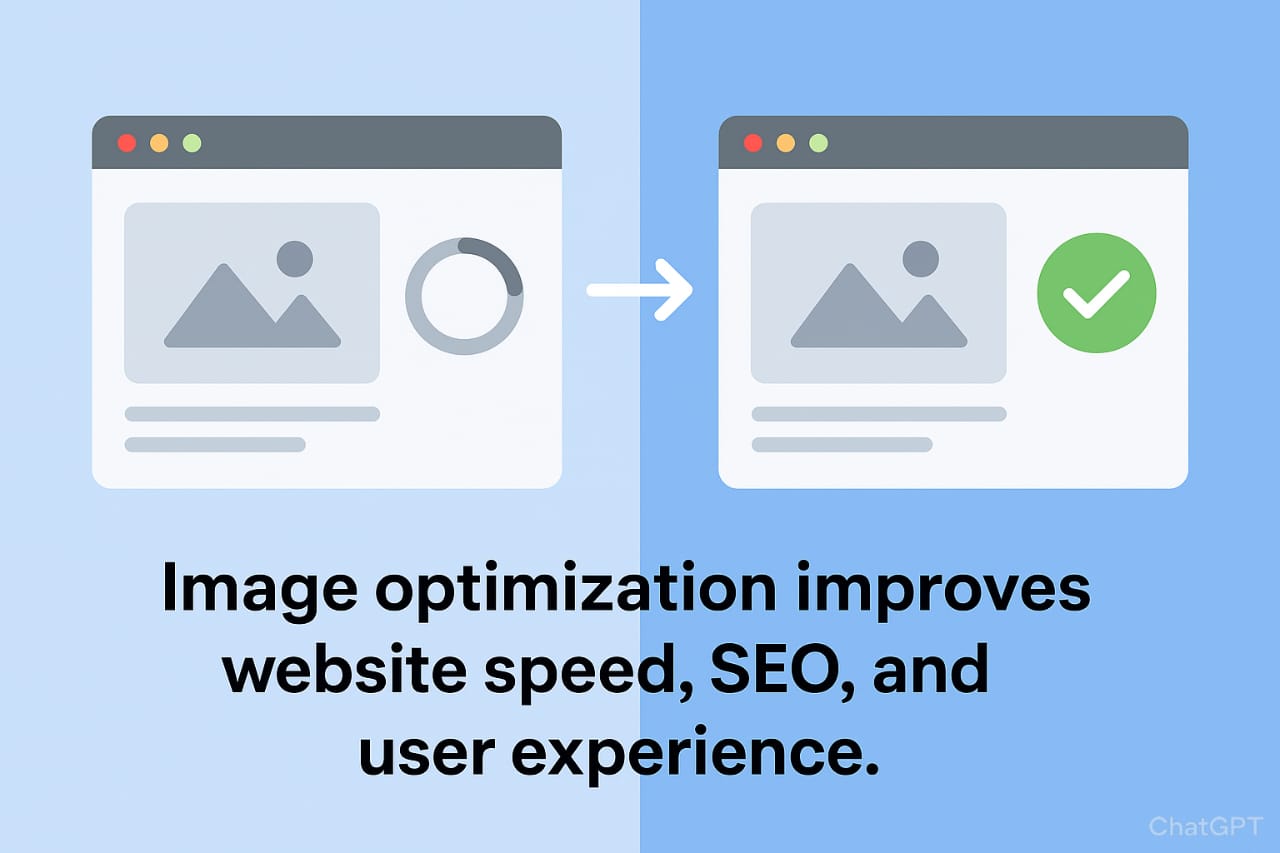
Website loading speed comparison - optimized vs unoptimized images
The Impact of Image Optimization on Website Performance
When you optimize images properly, your website loads faster, consumes less bandwidth, and provides a better user experience. Studies show that a one-second delay in page loading can reduce conversions by up to 7%. Since images typically account for 60-70% of a webpage's total size, using a free image compressor becomes essential for performance.
Optimized images directly impact your Core Web Vitals scores, particularly Largest Contentful Paint (LCP) and Cumulative Layout Shift (CLS). These metrics determine how Google ranks your website in search results.
How Image Optimization Affects SEO Rankings
Search engines prioritize fast-loading websites. Google's algorithm considers page speed as a ranking factor, making image optimization a crucial SEO strategy. When you compress images effectively, you're not just improving load times – you're boosting your search visibility.
Properly optimized images also improve crawl efficiency. Search engine bots can index your content faster when image files are smaller, leading to better search engine performance.
User Experience Benefits of Optimized Images
Mobile users, who represent over 50% of web traffic, particularly benefit from image optimization. Compressed images load faster on slower mobile connections and consume less data, improving the overall browsing experience.
Related: Mobile-First Design: Optimizing Images for Mobile Users
Understanding Image File Formats for Web Optimization
Choosing the right image format is fundamental to successful image optimization. Each format serves specific purposes and offers different compression capabilities.
Comparison chart showing different image formats with file sizes and quality examples
JPEG: Best for Photographs and Complex Images
JPEG excels at compressing photographs and images with many colors. This format uses lossy compression, meaning some image data is permanently removed during compression. However, when you use a quality free image compressor, the visual difference becomes negligible.
JPEG works best for:
- Photographs with complex color gradients
- Images with more than 16 colors
- Large images that need significant size reduction
PNG: Perfect for Graphics with Transparency
PNG format supports transparency and uses lossless compression, making it ideal for graphics, logos, and images with sharp edges. While PNG files are typically larger than JPEG, they maintain perfect quality.
Use PNG for:
- Graphics with transparent backgrounds
- Screenshots and simple illustrations
- Images requiring pixel-perfect clarity
- Graphics with text overlays
WebP: The Modern Solution for Better Compression
WebP, developed by Google, offers superior compression compared to both JPEG and PNG. This modern format can reduce file sizes by 25-50% while maintaining the same visual quality. Most modern browsers now support WebP, making it an excellent choice for image optimization.
Related: WebP vs JPEG: Which Format Should You Choose in 2024?
SVG: Scalable Vector Graphics for Icons and Logos
SVG files are vector-based, meaning they scale infinitely without quality loss. They're perfect for simple graphics, icons, and logos. SVG files are typically very small and don't require traditional image compression.
AVIF: The Next-Generation Image Format
AVIF offers even better compression than WebP, with up to 50% smaller file sizes. While browser support is still growing, AVIF represents the future of web image optimization.
Free Image Compressor Tools: Your Complete Toolkit
Having the right tools makes image optimization effortless. Here's your comprehensive guide to the best free image compressor solutions available today.
Screenshot grid showing popular free image compressor tool interfaces
Browser-Based Free Image Compressor Solutions
Online image compressors offer convenience without requiring software installation. These tools work directly in your web browser and handle most common optimization tasks:
TinyPNG: Excels at PNG and JPEG compression with impressive results. Simply drag and drop your images, and it reduces file sizes by up to 80% while maintaining visual quality.
Squoosh: Google's web-based image optimizer offers real-time compression previews. You can compare different formats and settings side-by-side, making it perfect for finding the optimal balance between size and quality.
CompressJPEG: Specializes in JPEG optimization with batch processing capabilities. This free image compressor handles up to 20 images simultaneously, making it efficient for bulk optimization.
Desktop Software for Bulk Image Optimization
For heavy-duty image optimization, desktop software provides more control and faster processing:
ImageOptim (Mac): This free tool automatically chooses the best optimization settings for each image format. It removes unnecessary metadata and applies lossless compression techniques.
RIOT (Windows): The Radical Image Optimization Tool offers advanced controls for finding the perfect compression settings. Its real-time preview helps you achieve optimal results.
GIMP: This free image editor includes powerful export options with customizable compression settings. Perfect for photographers who need precise control over image optimization.
Online Tools vs. Offline Solutions: Pros and Cons
Online free image compressor tools offer convenience and accessibility but may have file size limits. Offline solutions provide unlimited processing and better privacy but require installation and updates.
Related: Privacy-First Image Optimization: Why Local Tools Matter
Choosing the Right Free Image Compressor for Your Needs
Consider these factors when selecting your image optimization tools:
- Volume: How many images do you process regularly?
- Formats: Which image formats do you work with most?
- Quality requirements: How much compression can you accept?
- Workflow integration: Does the tool fit your existing process?
Image Compression Techniques: Lossy vs. Lossless
Understanding compression methods helps you make informed decisions about image optimization. Each technique serves different purposes and produces different results.
Visual comparison showing the same image compressed with lossy and lossless methods at different quality levels
Understanding Lossy Compression Methods
Lossy compression removes image data permanently to achieve smaller file sizes. While this sounds concerning, modern algorithms remove information that human eyes typically can't perceive.
JPEG compression works by analyzing image blocks and removing high-frequency details. When you use a quality free image compressor with proper settings, the visual impact remains minimal while achieving significant size reduction.
The key lies in finding the sweet spot – typically between 75-85% quality for JPEG images. This range provides excellent file size reduction while maintaining acceptable visual quality for web use.
When to Use Lossless Image Optimization
Lossless compression preserves all original image data while still reducing file sizes. This method works by finding more efficient ways to store the same information, similar to ZIP file compression.
Use lossless optimization when:
- Image quality is absolutely critical
- You're working with graphics containing text
- The image will undergo further editing
- File size isn't the primary concern
Quality Settings: Finding the Perfect Balance
The art of image optimization lies in balancing file size with visual quality. Start with these baseline settings and adjust based on your specific needs:
- High-quality photography: 80-85% JPEG quality
- General web images: 75-80% JPEG quality
- Thumbnail images: 60-70% JPEG quality
- PNG graphics: Use PNG-8 when possible, PNG-24 when transparency is needed
Batch Processing for Multiple Images
When optimizing numerous images, batch processing saves time and ensures consistency. Most free image compressor tools support batch operations:
- Prepare your images: Organize files in folders by type and intended use
- Set consistent parameters: Use the same quality settings for similar images
- Test first: Process a few sample images to verify settings
- Execute in batches: Process images in manageable groups
Related: Bulk Image Optimization: Time-Saving Strategies for Photographers
Step-by-Step Image Optimization Workflow
Creating a systematic approach to image optimization ensures consistent results and saves time. Follow this proven workflow for optimal results.
Flowchart showing the complete image optimization workflow from capture to implementation
Pre-Upload Image Preparation
Before using any free image compressor, prepare your images properly:
Resize appropriately: Don't upload a 4000px wide image if your website displays it at 800px. Resize images to their intended display dimensions first.
Choose the right format: Select JPEG for photographs, PNG for graphics with transparency, and WebP when browser support allows.
Clean up metadata: Remove unnecessary EXIF data that adds file size without value. Most free image compressor tools handle this automatically.
Using Free Image Compressor Tools Effectively
Follow these steps for optimal compression results:
- Upload your prepared images to your chosen free image compressor
- Select appropriate quality settings based on image type and usage
- Preview the results using before/after comparisons
- Adjust settings if the quality or file size isn't satisfactory
- Download the optimized images and rename them appropriately
Quality Control and Testing
Never skip the quality control phase. View your compressed images at actual display sizes and under different lighting conditions. Test how they appear on various devices and screen resolutions.
Pay attention to:
- Sharp edges and text clarity
- Color accuracy and gradient smoothness
- Overall visual appeal
- File size reduction percentage
Implementation and Monitoring
After optimization, implement your images and monitor their performance:
- Test loading speeds using tools like Google PageSpeed Insights
- Monitor Core Web Vitals scores for improvement
- Check mobile performance specifically
- Gather user feedback on image quality and site performance
Advanced Image Optimization Strategies
Take your image optimization to the next level with these advanced techniques that go beyond basic compression.
Code snippet examples showing responsive image implementation
Responsive Images with srcset and sizes
Responsive images serve different image sizes based on device capabilities and screen dimensions. This technique, combined with a good free image compressor, dramatically improves mobile performance.
<img src="image-800w.jpg"
     srcset="image-400w.jpg 400w,
             image-800w.jpg 800w,
             image-1200w.jpg 1200w"
     sizes="(max-width: 600px) 400px,
            (max-width: 1200px) 800px,
            1200px"
     alt="Optimized responsive image">
This approach ensures mobile users download smaller images while desktop users receive higher-resolution versions when needed.
Lazy Loading for Better Performance
Lazy loading defers image loading until they're needed, significantly improving initial page load times. Modern browsers support native lazy loading with a simple attribute:
<img src="optimized-image.jpg" loading="lazy" alt="Description">
Combine lazy loading with image optimization for maximum performance benefits. Users see content faster, and bandwidth is conserved for images that may never be viewed.
Progressive JPEG Loading
Progressive JPEGs load in multiple passes, showing a low-quality version first and gradually improving clarity. This technique, available in most free image compressor tools, improves perceived performance even when actual loading times remain the same.
Enable progressive JPEG encoding in your optimization workflow to enhance user experience, especially on slower connections.
Content Delivery Networks (CDN) for Images
CDNs serve optimized images from servers geographically closer to your users. Many CDN services include automatic image optimization features:
- Automatic format selection based on browser support
- Real-time resizing for responsive images
- Compression optimization without manual intervention
Related: CDN vs. Self-Hosted Images: Performance Comparison Guide
WordPress and CMS-Specific Image Optimization
Content Management Systems require special consideration for image optimization. Here's how to optimize images within popular CMS platforms.
Screenshot showing WordPress image optimization plugin interfaces and settings
WordPress Image Optimization Plugins
WordPress plugins automate image optimization, making it easier to maintain optimized images across your site:
Smush: This free plugin compresses images automatically during upload. It handles JPEG, PNG, and GIF formats with one-click bulk optimization for existing images.
ShortPixel: Offers both lossy and lossless compression options. The free tier processes up to 100 images monthly, making it suitable for smaller websites.
Imagify: Created by the WP Rocket team, this plugin provides excellent compression with WebP support. It includes bulk optimization and automatic image resizing features.
Automatic Image Optimization Settings
Configure your WordPress site for automatic image optimization:
- Set maximum image dimensions in WordPress settings
- Choose appropriate JPEG quality (usually 82% is optimal)
- Enable WebP conversion when supported
- Configure automatic resizing for uploaded images
Bulk Optimization for Existing Images
Most WordPress optimization plugins offer bulk processing for images already in your media library. This feature is essential when implementing image optimization on existing websites.
Plan bulk optimization during off-peak hours to avoid impacting site performance. Process images in batches rather than all at once to prevent server overload.
E-commerce Platform Considerations
E-commerce sites require special attention to image optimization due to the large number of product images:
Product image consistency: Use consistent dimensions and compression settings across all product images.
Thumbnail optimization: Create multiple optimized sizes for different display contexts (thumbnails, category pages, product pages).
Zoom functionality: Balance high-resolution zoom images with reasonable file sizes using progressive JPEG loading.
Related: E-commerce Image Optimization: Boost Sales with Faster Loading Product Pages
Measuring Image Optimization Success
Tracking the impact of your image optimization efforts helps justify the investment and identifies areas for improvement.
Dashboard screenshot showing Core Web Vitals scores before and after image optimization
Core Web Vitals and Image Performance
Google's Core Web Vitals directly relate to image optimization success:
Largest Contentful Paint (LCP): Often impacted by large, unoptimized images. Target LCP under 2.5 seconds for good performance.
Cumulative Layout Shift (CLS): Images without specified dimensions cause layout shifts. Always include width and height attributes.
First Input Delay (FID): While not directly related to images, heavy image processing can impact JavaScript execution and FID scores.
Tools for Testing Website Speed
Use these tools to measure image optimization impact:
Google PageSpeed Insights: Provides specific image optimization recommendations and shows potential savings from compression.
GTmetrix: Offers detailed image analysis, including format recommendations and compression suggestions.
WebPageTest: Provides filmstrip views showing how image loading affects visual progress.
Lighthouse: Built into Chrome DevTools, offers comprehensive performance analysis including image optimization opportunities.
Before and After Analysis
Document your optimization results to demonstrate improvement:
- Total page size reduction: Measure overall bandwidth savings
- Loading speed improvements: Compare page load times before and after
- User engagement metrics: Monitor bounce rates and time on page
- Search ranking changes: Track SEO performance improvements
Ongoing Monitoring and Maintenance
Image optimization isn't a one-time task. Establish ongoing monitoring:
- Monthly performance audits: Check for new optimization opportunities
- New content optimization: Ensure new images follow optimization standards
- Technology updates: Stay current with new formats and compression techniques
- User feedback: Gather input on image quality and site performance
Common Image Optimization Mistakes to Avoid
Learning from common mistakes helps you achieve better results with less frustration. Avoid these frequent image optimization pitfalls.
Split image showing common mistakes vs. best practices in image optimization
Over-Compression: When Quality Suffers
The most common mistake is pushing compression too far. While file size reduction is important, images that look obviously compressed harm user experience more than they help performance.
Signs of over-compression:
- Visible blocking or artifacts in smooth gradients
- Loss of detail in important image areas
- Color banding in sky or skin tones
- Blurry or pixelated text within images
Find the balance by testing different quality settings and viewing results at actual display sizes. Most free image compressor tools provide preview functionality to help avoid over-compression.
Wrong Format Selection
Using the wrong image format negates optimization efforts:
Don't use PNG for photographs: PNG files become unnecessarily large for complex images with many colors.
Avoid JPEG for simple graphics: Sharp edges and solid colors compress poorly with JPEG, often resulting in artifacts.
Skip WebP without fallbacks: Always provide fallback formats for browsers that don't support WebP yet.
Ignoring Mobile Optimization
Desktop-focused optimization often fails mobile users. Consider these mobile-specific factors:
- Smaller screens need smaller images: Don't serve full-resolution images to mobile devices
- Slower connections: Mobile users often have limited bandwidth
- Touch interactions: Ensure optimized images still support touch-based interactions
Forgetting Alt Text and SEO Elements
Image optimization extends beyond file compression. Don't neglect:
Alt text: Describes images for accessibility and SEO. Include relevant keywords naturally.
File names: Use descriptive, keyword-rich filenames instead of generic camera names.
Image sitemaps: Help search engines discover and index your optimized images.
Structured data: Use schema markup for images when appropriate.
Related: Image SEO: Beyond Optimization - Complete Guide to Image Search Rankings
Future of Image Optimization
Stay ahead of the curve by understanding emerging trends and technologies in image optimization.
Timeline graphic showing the evolution of image formats and optimization technologies
Emerging Image Formats and Technologies
AVIF adoption: As browser support grows, AVIF will likely become the preferred format for many use cases due to superior compression ratios.
JPEG XL: This next-generation format promises better compression than current options while maintaining backward compatibility.
Variable quality encoding: Future compression algorithms will automatically adjust quality based on image content importance.
AI-Powered Image Compression
Machine learning is revolutionizing image optimization:
Content-aware compression: AI analyzes image content to apply optimal compression settings automatically.
Perceptual optimization: Algorithms that understand human visual perception compress images more effectively.
Automatic format selection: AI chooses the best format and settings based on content analysis and user context.
Browser Support and Adoption Trends
Modern browsers increasingly support advanced image features:
- Native lazy loading: Reduces the need for JavaScript-based solutions
- Improved WebP support: Making modern formats more viable
- Automatic image optimization: Browsers may begin optimizing images automatically
- Better compression algorithms: New techniques built into browsers themselves
Conclusion: Start Your Image Optimization Journey Today
Image optimization is no longer optional – it's essential for website success. Whether you're a blogger, photographer, e-commerce owner, or web developer, mastering image optimization directly impacts your results.
Start with the basics: choose appropriate formats, use a reliable free image compressor, and implement responsive images. As you gain experience, explore advanced techniques like lazy loading and CDN integration.
Remember that image optimization is an ongoing process. Technology evolves, user expectations change, and new tools become available. Stay curious, keep learning, and regularly audit your optimization efforts.
The investment in proper image optimization pays dividends through improved user experience, better search rankings, and reduced bandwidth costs. Your users will appreciate faster loading times, and search engines will reward your performance-focused approach.
Take action today. Audit your current images, implement the techniques discussed in this guide, and start using free image compressor tools to transform your website's performance. Your optimized images are just a few clicks away.